Sunday, 27 September 2015

Mini Gothic House - Nanny McPhee

The turret! 

I've started to glue parts of the house together for my Nanny McPhee project...but this has taken careful thought for laying light wires and decoration, so I'm not putting it together in the order you are supposed to....hmmm....I've had a few restless nights with my brain in overdrive trying to think through and work out what order to build this! lol  
The turret is intended for merely decoration, but I want it as a real room! It's where Nanny McPhee sits and reads her book and drinks her tea. ;o) So I've had to work out how to make this and make it accessible once its built.
 I've pre-stained the base in readiness for its floorboards.
 This turret has 3 windows...and they all need interior decoration before it's constructed. I will also need to add the exterior decoration before the upper bedroom is added too, otherwise it could be tricky to get my hand in the void behind the turret. 
The room has wooden battens, but these are too narrow, I didn't have an image to check at the time of trying, so I will use wider battens. ;o)  They need considerable work, lots of paint applications and even mouldy moss in gaps!     
I've also glue 2 of the 3 sides on. I used resin based blue, it's much stronger than wood glue, it's also water resistant and can be painted etc. The second floor is not glued in, just there to ensure the walls are straight.
 This wall is not glued in...
 This wall is glued in!
 I've left weighted down and in situ overnight to dry, lets hope the floor still comes out! lol
 This is where I want the front steps to go... 
This is the tongue and groove I will be using, it does take some space from the room, however, it's unusual space. I can get only 3 beds in...that's including the cot. Each bed has either a bedside table or chair by the side. The beds should go along this wall.....however, it does make the room look tight for space....
 I will need to close off the void where the tongue and groove will leave a gap.
 I may put the beds a long the back wall instead....I will see. ;o) 
I've also made the interior walls. It has really made a difference. It's all still very raw and all WIP and the additional walls will need to decorated (the hall wall) before its glued in.
I was going to have the door where the bit of the painted extra wall is...but I want the fireplace on that side wall and it would look silly having a door opening onto the fireplace, so I've opted for a false door to go on the other side wall.  
 The l-shaped hallway that I've created.

 The fireplace will now go here....where the upside down chimney stack is! lol
It was going to go here at one point. 
My Dad cut me out a back wall for the house, it will fit snugly on the back, not where it is now!
I'm going to attach via a piano hinge and either or both a tiny round magnet and hook and eye on the upper part of the house. I'm not sure whether to have the hinge on the inside of the house... 
 Or attached to the outside of the house.....
So I can dress the back wall, I'm going to add a ledge like I did for Slug and Jiggers. It will enable me to add a bookcase and a tiny table. I will also have a false door for the end of the hallway to give the impression of more rooms. ;o) I haven't thought about how to dress the upper part of the back wall yet. ;o)
You do have to allow space in the room for it though, it's a bit of a trade off really. I can't dress the back of the house as normal, but having the ledge allows me to have the bookcase etc., I only need to move the furniture into the room a little more. ;o)

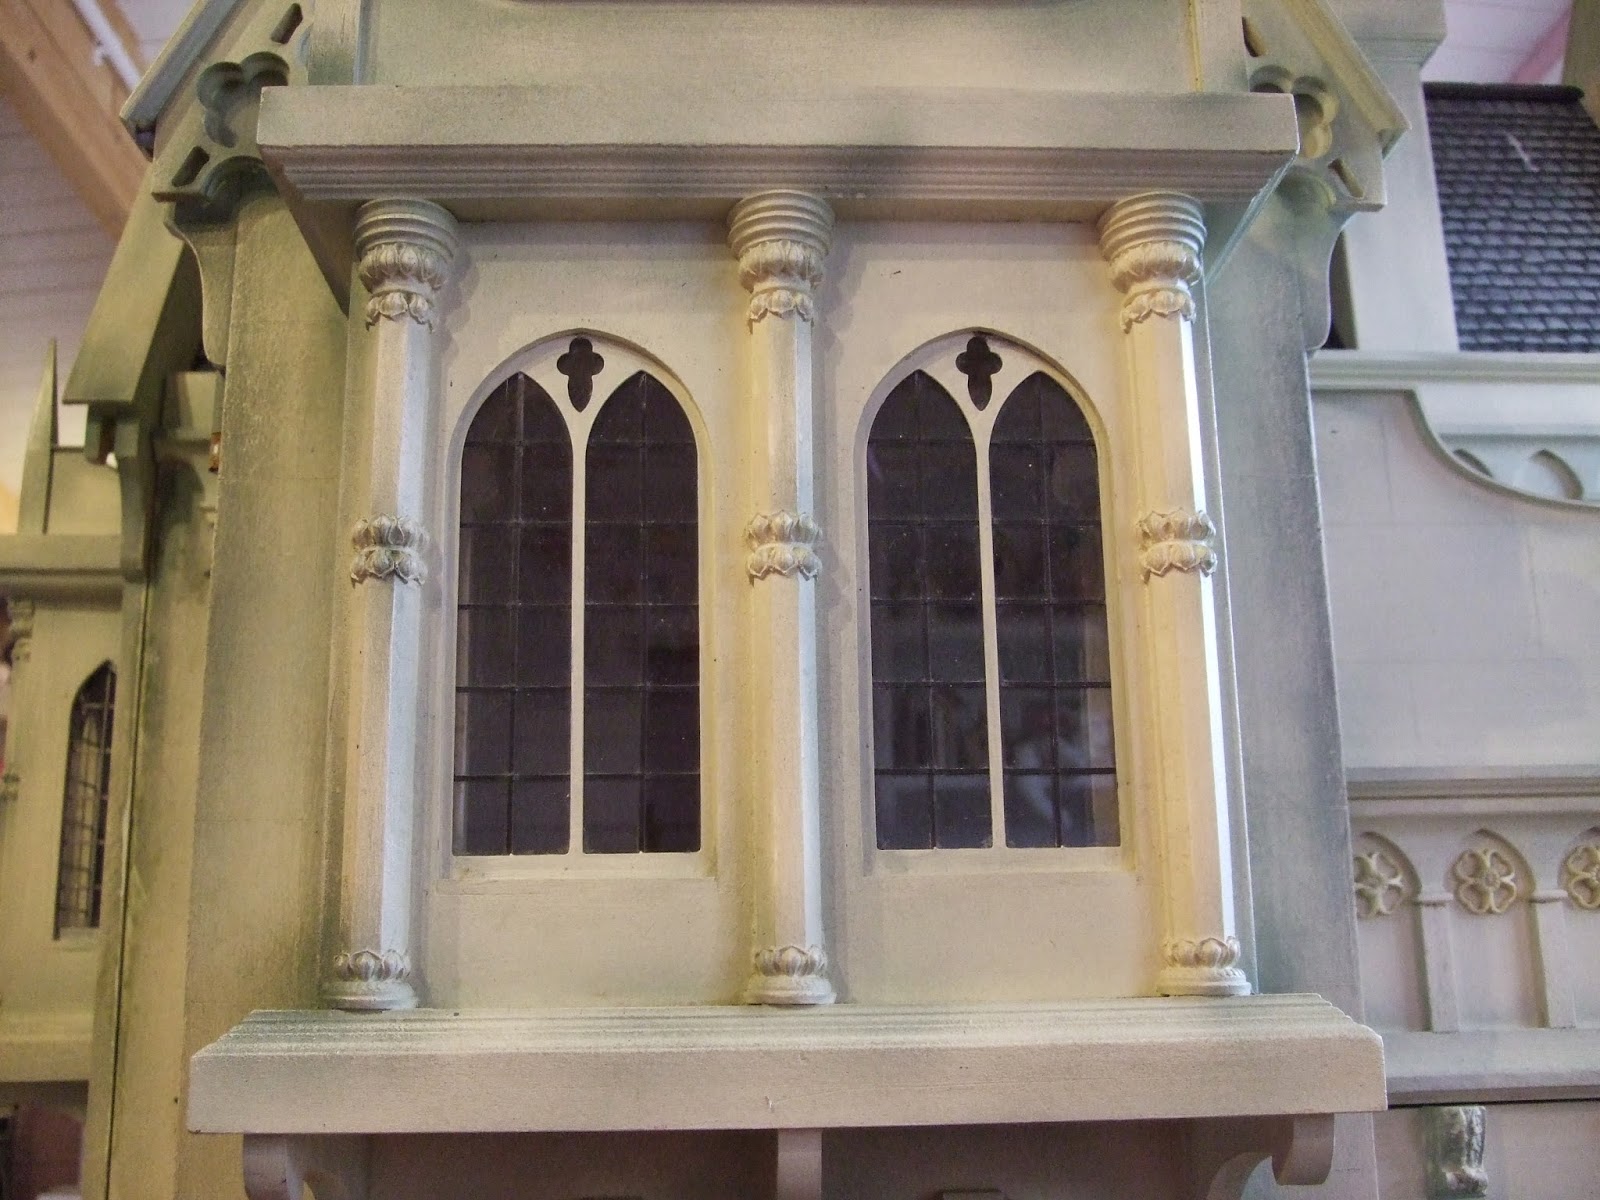
I'm unsure what to do with the deep bay window...whether to add a window seat or leave as a deep window with a chair etc there. 

I hope you don’t mind my ramblings and madness! :o))


Michelle xxxx

Thursday, 17 September 2015

All things Gothic...


Just a little impromptu post!I may have been quiet but I have been busy. ;o)


The main builds of Mrs Puddifoot's Teashop, Sugar Plum's Sweet Shop, Flourish & Blotts and Mr Mulpepper's are all but finished bar some small things that need finishing.  I am still busy buying for the fillings of...alas that is an ongoing thing!  I am awaiting commissions to be completed for Mrs Puddifoot's, and Slug & Jiggers. So my attention and time has been diverted to new and existing projects that require starting on and completing!

The new projects are all Gothic architecture, however my current one is probably more of an unusual Victorian building. Its theme started off as something else, but I woke up one morning this week and decided it would make a better small, but Nanny McPhee's house. It's a project that's been on  the back burner for a few years and was going to be in a much larger house, but as you only see a handful of rooms it got downsized to a room box at one point....but it's been upgraded to a one up and one down house instead! lol 
I'm not sure I'll keep all the porch/veranda detailing...I may make it more Nanny McPhee house like. 
 The inside is tiny!I may add a wall or too to make it more interesting...
 However, space is tight! lol
The high apex of the roof makes for a perfect children's bedroom...it's supposed to sleep 7, one being a cot. I'll have to see what I have room for. Again, changes will be made and I will add tongue and groove to create a low inner wall.

The above show all dry build photo's...I have a few American kits, but this is the first one that I've built and they are so different from British ones and having an open back is only one such difference.  This one is built by floor's and I don't think all American kits are. However, I am hopeful I can glue the bottom half segments together so I can decorate easier...as long as I add the upper floor whilst the segments are drying, to keep them in the correct positions, and then remove it once they are secure and dry. Well that's my plan and aim. ;o)

 Painting is still ongoing as I write, but I have glued these pieces together.
I'm not sure I will use all the pretty embellishments for this building, I may use the surplus for another project that I am doing.
Anyone that knows the film and house knows it's rather outlandishly decorated....the word tacky and bright doesn't cover it! lol I'll be doing the garish green study and the children's bedroom. I may add some of the pertinent colours to the outside window frames etc...but I will see, because what works in real life doesn't always work in miniature.
 I may add a stained glass window to this arched window.
 I've stained the floor before I start on any type of flooring to be added. 
The is the front door wall panel and a half way wall that goes inside the house. I may create a hall way here  (where the screwdriver is laying) with a doorway into the study. The hallway is a deep shade of cobalt blue! The entire house is in a rather distressed and rotten state too! lol
Or I may create an l-shaped hallway....and have the stained glass window in it. It all depends on how much space I think I need for the study, but I think it will work though. I am going to add a back wall that opens out which will cover the back of the house. This will help to reduce dust getting into the building and I can add false doors and dress it hopefully too.  
The front and its veranda. The real house has decorated porch posts and steps from the front. This house has steps up from the side....I may change that too. 
I'm going to add aged Victorian red tiles here...alas I am awaiting the seller to come back off holiday so I can purchase some! Arh....the waiting game again! 

 I hope you don’t mind my ramblings and madness! :o))

Michelle xxxx

Wednesday, 29 July 2015

Sugar Plum's Sweet Shop and an update!

 I've been quite but busy! Busy with real life, work and mini's! You may have noticed some rather radical changes to my blog too!

I have been working on Mrs Puddifoot's Tea Shop and Sugar Plum's sweet Shop simultaneously. The latter was started way back in 2011 and I was going to sell it at one point! The reason I chose such a tiny kit is because I really dislike filling larger shops, but the upstairs posed limitations as to what I wanted to do. So, a lot of the ideas for that will now go into another shop/factory. This awakened the idea of a radical rethink of what projects I wanted to do, but most importantly one's that were really physically too much for me. I am awaiting my new electric wheelchair that will allow me to reach my higher and larger projects, however, it's still very physically draining for me to work on big projects. I found it so much easier working on both the tea shop and sweet shop because of their tiny size. The onset of Meniere's Disease (and its progressive damage) has greatly reduced my physical capacity in more ways than I care to mention and although not a killer disease it is truly life changing nonetheless. My hobby is much more than a hobby for me, it serves as a great therapy for my Meniere's and really does help me relax so I don't have to pop so many pills and/or lie down for days/weeks at a time.  I rarely leave the house and now work from home for which I am extremely grateful for. However, if any or part of my hobby becomes a source of stress it is extremely counter-productive and unhealthy.

So over the last few months it's been a gradual and slow realisation that I just have too many projects and kits, a stress inducer which I don't need! I have sold a few larger kits over the last few months, but after having to move some of my bedroom stuff into my cabin whilst its gutted and redecorated has bought home to me that it's now time to radically reduce my collection. The larger built but not decorated houses and shops will hopefully be sold locally, infact as many as I can as it saves the effort of packing them for posting, kits are far easier to post! ;o) I'm selling new and vintage shops and houses, built ones and kits....any I no longer want and quite a few have already been earmarked to go! ;o) Selling these on will allow and afford me space for smaller projects and more random themes, I also won't have the feeling of forever plugging away and feeling like I'm not getting very far. Once I have my new chair I can work on my Victorian Gothic house, it doesn't require masses of work but once that's all done I can get dressing it. 

So, I'm going to be quiet for a while longer yet...I need to re-plan my work space in my cabin, none of this will happen overnight.

Anyhow, on a lighter note, here is long overdue work I've recently completed on Sugar Plum's Sweet Shop, an unseen shop in Harry Potter. I've only ever seen a sketch of it, so it's all rather whimsical. I'm not sure I would have chosen this rather pretty kit now, if I had, I would have sawn off the fancy part on the front fascia, instead I chose to make a feature of it.  Hmmmm...it's a love hate project and will go next to Mrs Puddifoot's Tea Shop!

Please excuse the photo's quality, they were all taken on my phone and in rotten weather (low light!).
The inside of the roof was so boring, I'm added rafters and wooden battens (very similar look to my witch's house).  
 It took me ages to age the wood! lol I have tried to match the interior repairs to the roof the outside of the roof damage. ;o)
I've added lead to my chimney stack.
I've been working on the shop unit's, I've embellished and added trims and still painting! Still very much WIP!!!! lol :o)

I hope you don’t mind my ramblings and madness! :o))

Michelle xxxx

Saturday, 18 April 2015

The Victorian Gothic - AKA Hogwarts

Before I start I am mighty tardy with replying to comments, emails , text's and messages....normal communicative service will resume as soon as possible! ;o)

I was extremely fortunate to be able to purchase a rather special doll's house for my collection. It was built as an OOAK commissioned piece (I imagine copied off a real building) some 20 years ago and made by a John Strulger (unsure of the spelling, I think it's incorrect, if anyone out there knows the maker, please say!!! ;o)) ) of Battlesbridge in Essex. Sadly the maker died many years ago and this was his last piece. 

I personally think it's a magnificent and majestic piece. I have never ever seen a doll's house that opens on all 4 sides. It's 2 and a half feet by just over 2 and half feet so not enormous, but it's high! It isn't electrified and I can see why that would be a challenge..so  I may have to opt for hidden LED's, or wall LED's (not as unattractive as the hanging ones). However, I may also opt for artisan made ones for aesthetic reasons...but not have them working.   

It does need some restoration, the interior isn't all inkeeping with the era, so I will endeavour to correct that. I love anything Gothic original or anything from the Victorian revival and I've had a long and enduring love and admiration of Augustus Pugin's work, and anyone who has seen the interior of the Palace of Westminster or Eastnor Castle will know why.    

I knew I wanted a Gothic project for Hogwarts...so this house will be a version of it. Not a like for like because I want to keep true to the era and architecture where I can, I don't want to spoil this house in anyway. ;o)  
This is one of the rooms, it will be Professor Umbridge's office! The Georgian look is not wanted...so it has been removed already. ;o)
This side door leads to a void (see below), I could have some interest going on in the doorway seeing she likes to punish students a tad too severely!
Here it is stripped back. I am hoping to replace the Georgian cornicing with Sue Cook's Gothic cornicing and other plaster embellishments. I'm not sure it will be possible in all the rooms...but it's something I'd like to do. ;o)   The ceiling's wallpaper detailing will be removed in due course too! 
This is where the door leads into....it has a mini roof too. 
I'm awaiting delivery of the missing floor with balustrade and half staircase, unfortunately it got left behind at the owners (unsure why it was removed). The patterned wallpapered room will be the Gryffindor's common room. I like the wallpaper, but I want to hang a tapestry of two so I will opt for something else.   ;o) The downstairs room will be Dumbledore's office.  
 It's a nice size room, I sound like an Estate Agent! lol ;o) 
 I hope to add a Gothic fireplace in here, again a Sue Cook one.
 The door on the left leads into a small hallway...
 The Arts and Crafts sun window (all real leaded light and real glass).
 The small hallway...
Inside...I plan on having trunks and maybe the odd owl! lol 
Wonderful lights on the right. The original owner had a love of white and blue bluetak....mini's worst enemy, I still spy tiny bits, so I will go around and check again!
 This door leads into Dumbledore's office.
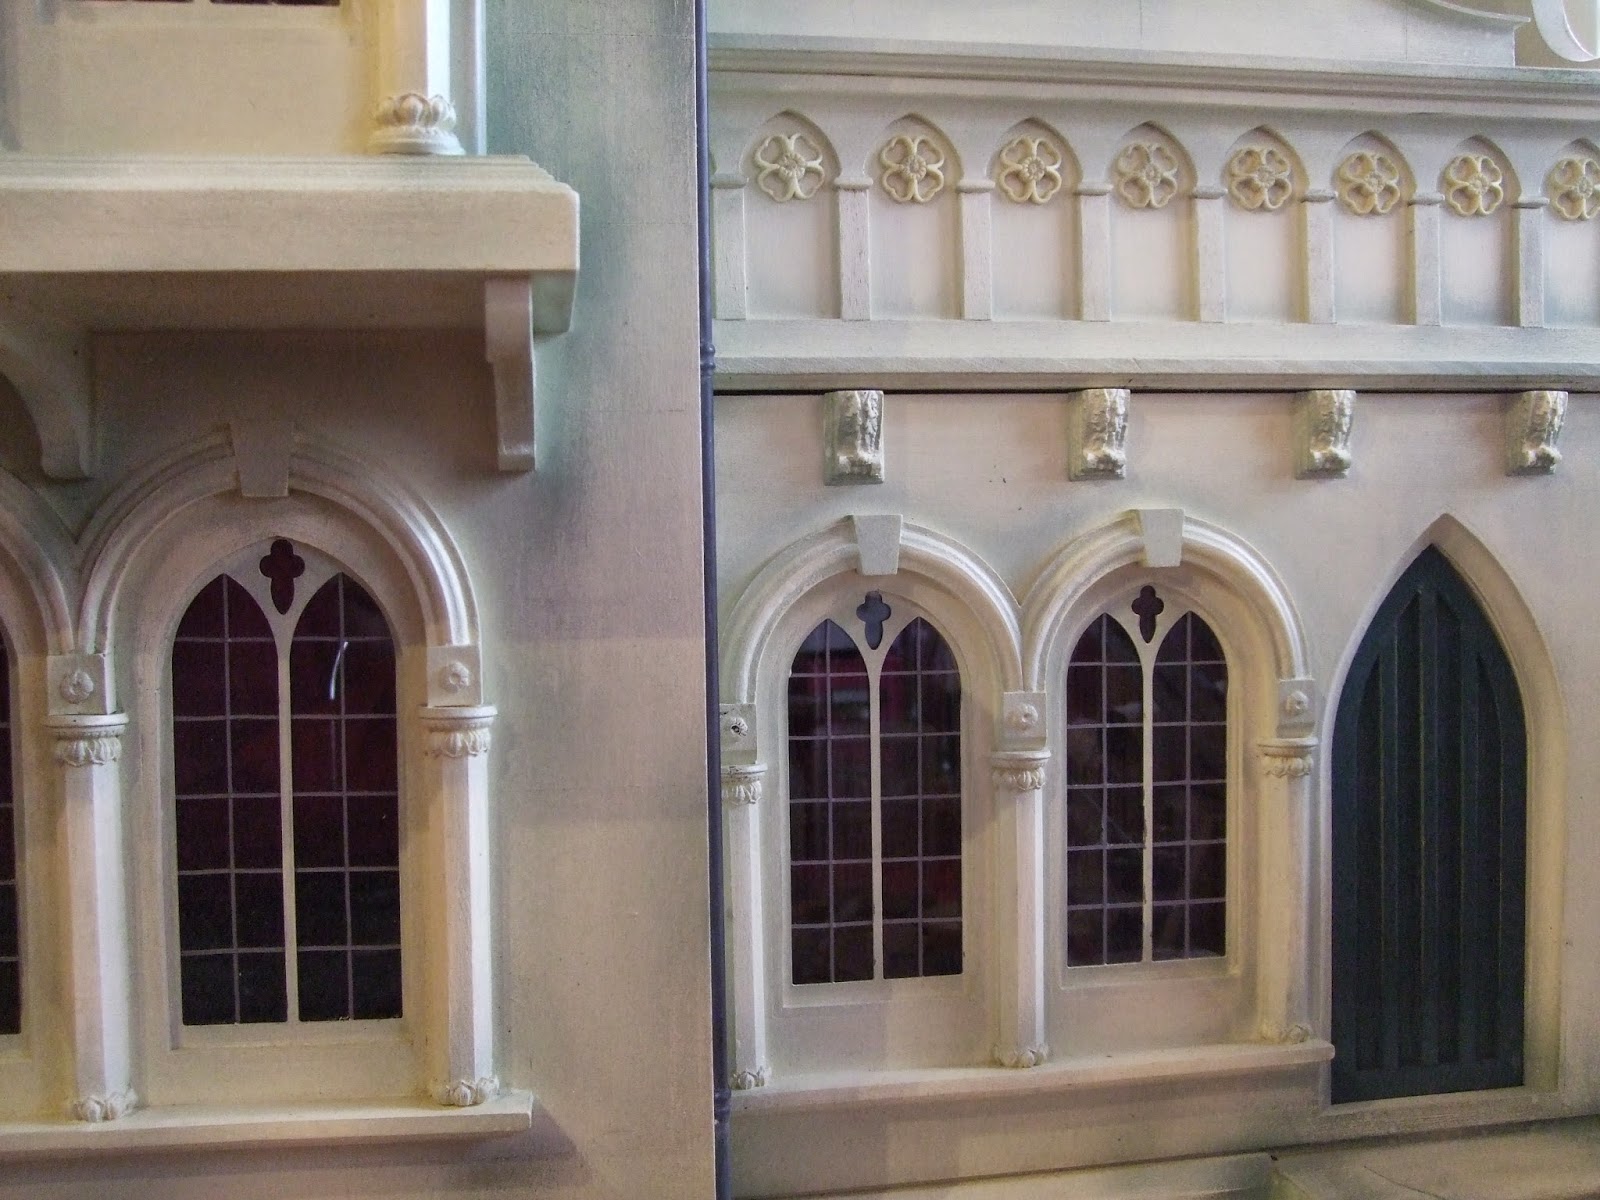
 Each of the windows has very detailed window cills. 
All the sides were removed upon moving to my home etc, so I've taken photo's of without and with. 
 One of the 3 upstairs rooms.
 A false archway, so I may put a bed in that bit (the headboard end!). 
 The other bedroom..I will see if I can put that light at the same height! lol
 Very interesting views! ;o)
  I'm doubtful I will change a thing in these rooms as they are as they should be. 
 I love the view looking through...
With a few pieces of furniture added. ;o)
 Again, no sides attached...yet!
The main gallery. It has paper for the brickwork and some is torn or has bluetak grease marks. Unsure at present what the solution will be. Either to make the best of it, or replace it with something better and more realistic.
 I will hang portraits of the deceased wizards and witch's on the walls! All Arts and Craft's doors, they all at one point had knobs etc., no idea why they have all been removed, including the exterior ones.
 
Windows looking into a bedroom...well I think it will be a bedroom! lol I will have a small bathroom I think in another room upstairs!

 The walkway below which is open ended. I will make steps and it will lead into the forecourt.
My Sid Cooke Gothic greenhouse. It will have a rough and aged forecourt here with a large centre fountain...all aged etc of course! lol 
I prefer it situated this way, however impossible to view the side facing the window, so this side (that  you see face on) will face the cabin window.    
The roof is an embossed tiled sheeting (unsure why the maker opted for this?). I'm not sure these will stay longterm. From a distance they look perfect and look right for the house. I may opt for read slate tiles or something else but actual tiles rather than this. It's real lead flashing on the roof too and so that needs to be taken into consideration if I opt for real tiles as I'll have to put that back.
 I love the interesting roof lines.
 I do have the missing railing piece, though some needs replacing as it's broken.

 I love the big bay windows and will be wonderful to dress!
 Real lead guttering.
Lots of detailing...I've been doing a lot of looking! lol 


 This is how it's displayed now....
The gallery is the first thing you see as you enter the cabin.
With the flash on...you can see the colour difference! It is like the photo without the flash on. 
  One of the opening panels. 
A Sue Cook Gothic fireplace. It will actually go into Professor Umbirdge's office (I bought it for that). It needs a hearth and grate etc. 
Trying some of my pieces that I've collected over the years! I've only added a small portion of my collection so far, just to get a feel of space etc. 


My OOAK fairy study table is by Ericka VanHorn. The table and many of the contents were made by various talented artisans a long with Ericka's fabulous work too! ;o)
 Professor Umbridge's office.
The velvet chair is by Jain Squires. It is actually for my Nanny McPhee house, but maybe Umbridge can borrow it for a while till I get the one I want for her room. ;o)  
The vase of double tulips is by Catherine Davies.
 Trying one of the beds!


 This will be the Great Hall...which leads into the fairy study room and Dunbledore's office.
 Side archway leads into the fairy study room.

The truly fabulous trunk is  made by Tony Hughes of Miniature Treasures. ;o) 
  The floor needs a dust...you can't see it, I know it's there! lol 
One of my all time favourite pieces,Dumbledore's desk. part of a commission by Tony (I've not got all the wonderful pieces out  yet!). The chair (along with most of the other Tudor pieces you see) are made by Mike Mortimer. ;o) 
The potion's room...I have lots of stuff for all the rooms, this is just a little on show here.
The knoll sofa etc (the ties need tidying up!)I bought ages ago for another project, I think I'll have this in Gryffindor's common room despite being more opulent! 
The table that came with the house.....it's a shame I can't use it for its proper purpose, but it matches the cabin and our garden furniture perfectly!

  I hope you don’t mind my ramblings and madness! :o))

Michelle xxxx