
Before I start I am mighty tardy with replying to comments, emails , text's and messages....normal communicative service will resume as soon as possible! ;o)
I was extremely fortunate to be able to purchase a rather special doll's house for my collection. It was built as an OOAK commissioned piece (I imagine copied off a real building) some 20 years ago and made by a John Strulger (unsure of the spelling, I think it's incorrect, if anyone out there knows the maker, please say!!! ;o)) ) of Battlesbridge in Essex. Sadly the maker died many years ago and this was his last piece.
I personally think it's a magnificent and majestic piece. I have never ever seen a doll's house that opens on all 4 sides. It's 2 and a half feet by just over 2 and half feet so not enormous, but it's high! It isn't electrified and I can see why that would be a challenge..so I may have to opt for hidden LED's, or wall LED's (not as unattractive as the hanging ones). However, I may also opt for artisan made ones for aesthetic reasons...but not have them working.
It does need some restoration, the interior isn't all inkeeping with the era, so I will endeavour to correct that. I love anything Gothic original or anything from the Victorian revival and I've had a long and enduring love and admiration of Augustus Pugin's work, and anyone who has seen the interior of the Palace of Westminster or Eastnor Castle will know why.
I knew I wanted a Gothic project for Hogwarts...so this house will be a version of it. Not a like for like because I want to keep true to the era and architecture where I can, I don't want to spoil this house in anyway. ;o)


This side door leads to a void (see below), I could have some interest going on in the doorway seeing she likes to punish students a tad too severely!

Here it is stripped back. I am hoping to replace the Georgian cornicing with Sue Cook's Gothic cornicing and other plaster embellishments. I'm not sure it will be possible in all the rooms...but it's something I'd like to do. ;o) The ceiling's wallpaper detailing will be removed in due course too!

This is where the door leads into....it has a mini roof too.

I'm awaiting delivery of the missing floor with balustrade and half staircase, unfortunately it got left behind at the owners (unsure why it was removed). The patterned wallpapered room will be the Gryffindor's common room. I like the wallpaper, but I want to hang a tapestry of two so I will opt for something else. ;o) The downstairs room will be Dumbledore's office.

It's a nice size room, I sound like an Estate Agent! lol ;o)

I hope to add a Gothic fireplace in here, again a Sue Cook one.

The door on the left leads into a small hallway...

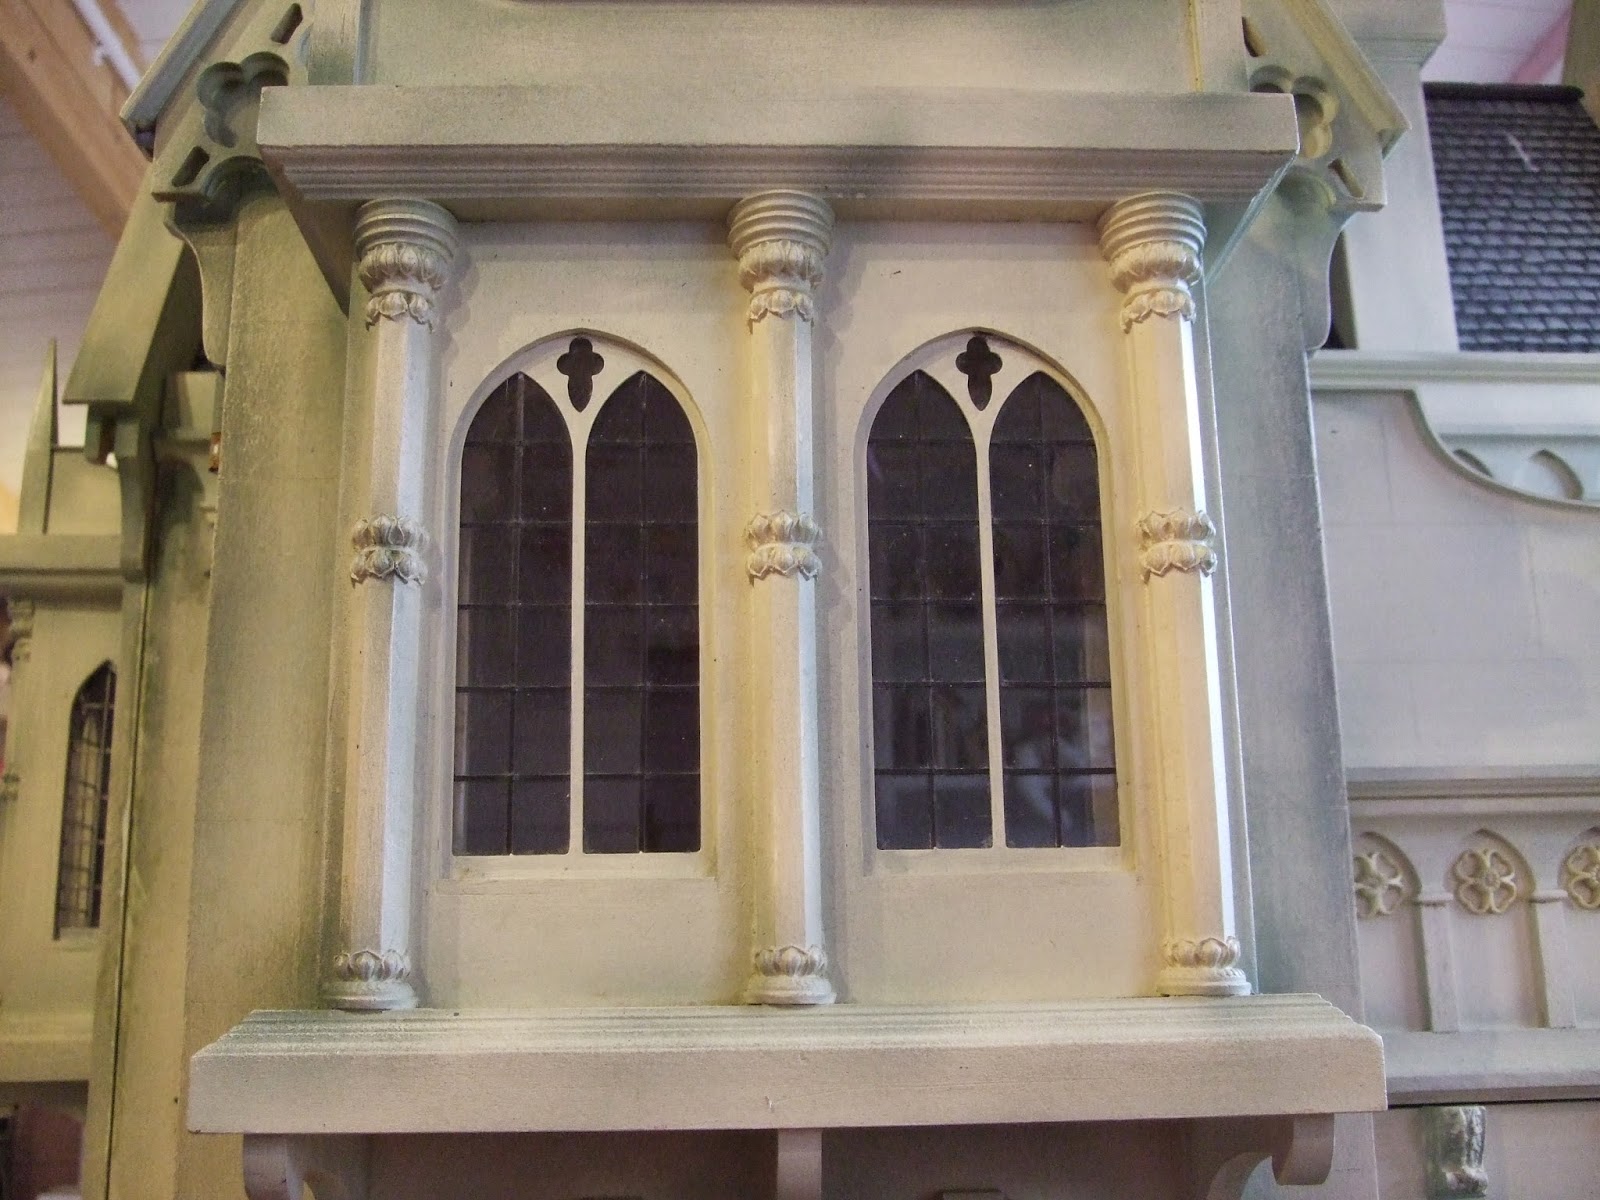
The Arts and Crafts sun window (all real leaded light and real glass).

The small hallway...

Inside...I plan on having trunks and maybe the odd owl! lol

Wonderful lights on the right. The original owner had a love of white and blue bluetak....mini's worst enemy, I still spy tiny bits, so I will go around and check again!

This door leads into Dumbledore's office.

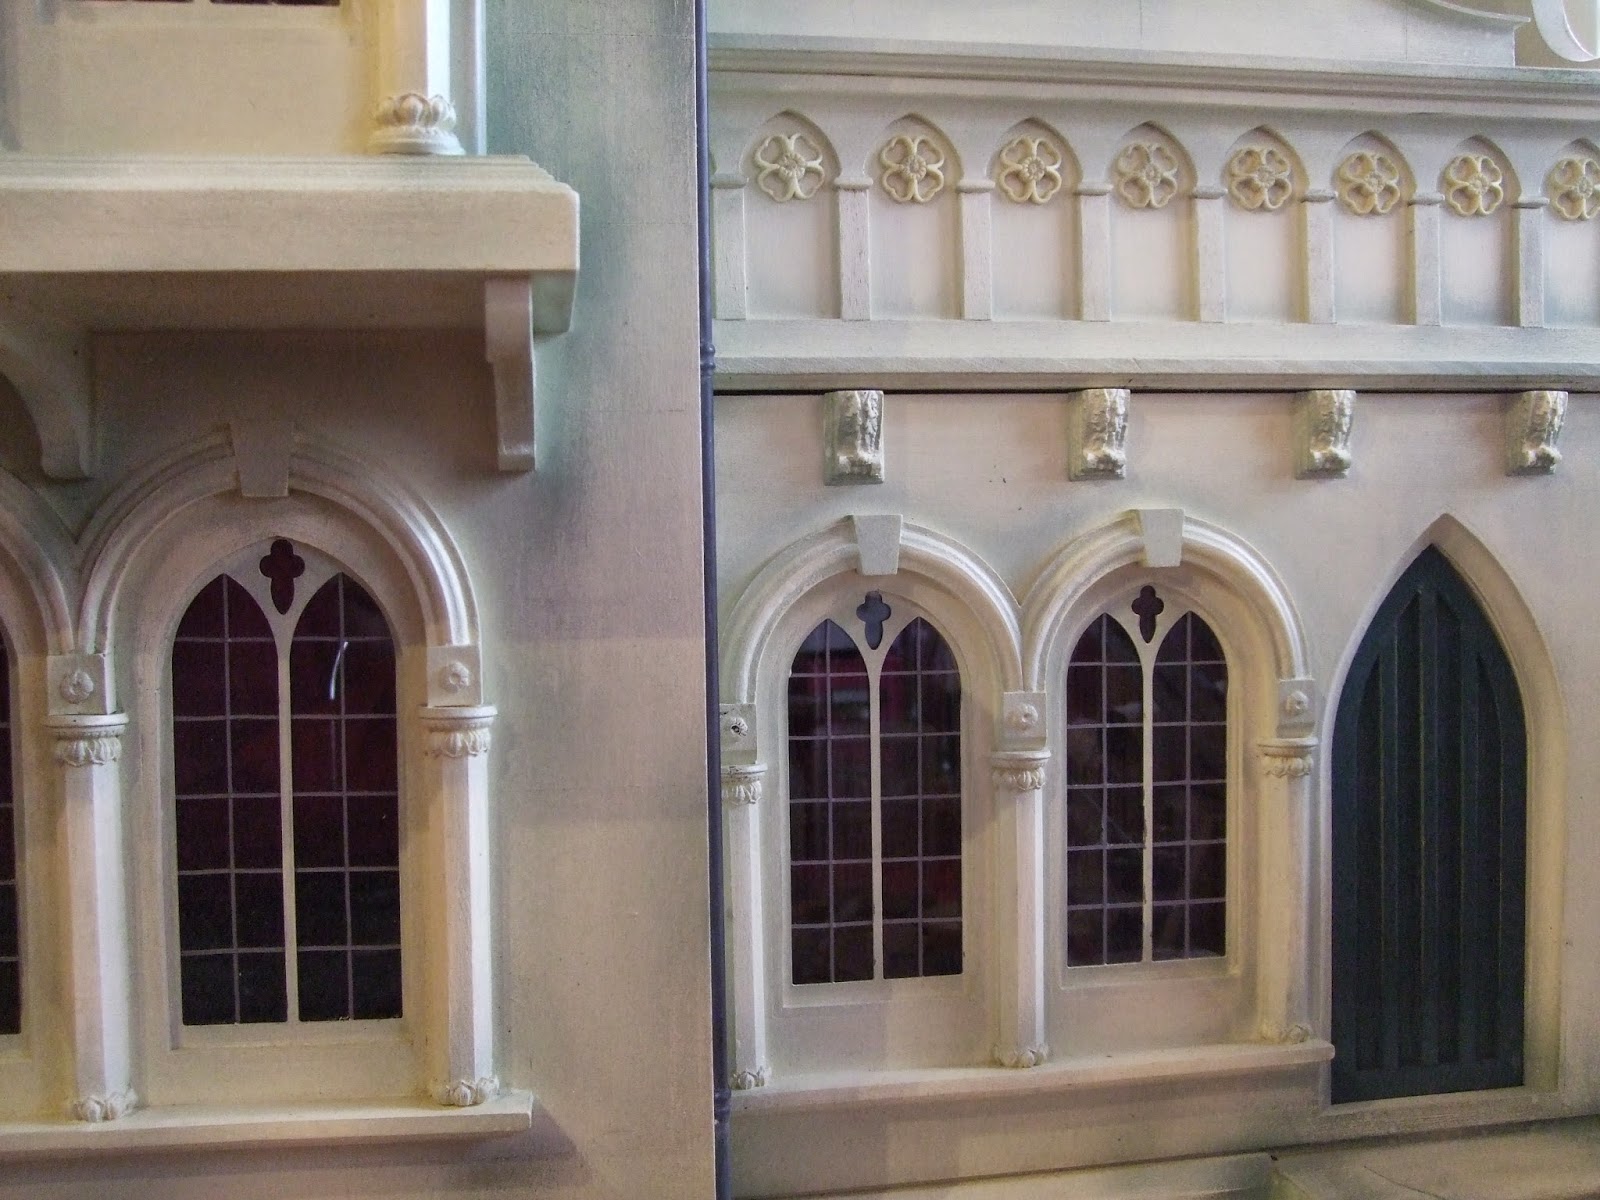
Each of the windows has very detailed window cills.

All the sides were removed upon moving to my home etc, so I've taken photo's of without and with.

One of the 3 upstairs rooms.

A false archway, so I may put a bed in that bit (the headboard end!).

The other bedroom..I will see if I can put that light at the same height! lol

Very interesting views! ;o)

I'm doubtful I will change a thing in these rooms as they are as they should be.

I love the view looking through...
 With a few pieces of furniture added. ;o)

Again, no sides attached...yet!

The main gallery. It has paper for the brickwork and some is torn or has bluetak grease marks. Unsure at present what the solution will be. Either to make the best of it, or replace it with something better and more realistic.

I will hang portraits of the deceased wizards and witch's on the walls! All Arts and Craft's doors, they all at one point had knobs etc., no idea why they have all been removed, including the exterior ones.

Windows looking into a bedroom...well I think it will be a bedroom! lol I will have a small bathroom I think in another room upstairs!


The walkway below which is open ended. I will make steps and it will lead into the forecourt.

My Sid Cooke Gothic greenhouse. It will have a rough and aged forecourt here with a large centre fountain...all aged etc of course! lol

I prefer it situated this way, however impossible to view the side facing the window, so this side (that you see face on) will face the cabin window.

The roof is an embossed tiled sheeting (unsure why the maker opted for this?). I'm not sure these will stay longterm. From a distance they look perfect and look right for the house. I may opt for read slate tiles or something else but actual tiles rather than this. It's real lead flashing on the roof too and so that needs to be taken into consideration if I opt for real tiles as I'll have to put that back.

I love the interesting roof lines.

I do have the missing railing piece, though some needs replacing as it's broken.

I love the big bay windows and will be wonderful to dress!

Real lead guttering.

Lots of detailing...I've been doing a lot of looking! lol


This is how it's displayed now....
 The gallery is the first thing you see as you enter the cabin.
 With the flash on...you can see the colour difference! It is like the photo without the flash on.

One of the opening panels.

A Sue Cook Gothic fireplace. It will actually go into Professor Umbirdge's office (I bought it for that). It needs a hearth and grate etc.

Trying some of my pieces that I've collected over the years! I've only added a small portion of my collection so far, just to get a feel of space etc.


My OOAK fairy study table is by Ericka VanHorn. The table and many of the contents were made by various talented artisans a long with Ericka's fabulous work too! ;o)

Professor Umbridge's office.

The velvet chair is by Jain Squires. It is actually for my Nanny McPhee house, but maybe Umbridge can borrow it for a while till I get the one I want for her room. ;o)

The vase of double tulips is by Catherine Davies.

Trying one of the beds!


This will be the Great Hall...which leads into the fairy study room and Dunbledore's office.

Side archway leads into the fairy study room.

 The truly fabulous trunk is made by Tony Hughes of Miniature Treasures. ;o)

The floor needs a dust...you can't see it, I know it's there! lol
 One of my all time favourite pieces,Dumbledore's desk. part of a commission by Tony (I've not got all the wonderful pieces out yet!). The chair (along with most of the other Tudor pieces you see) are made by Mike Mortimer. ;o)

The potion's room...I have lots of stuff for all the rooms, this is just a little on show here.

The knoll sofa etc (the ties need tidying up!)I bought ages ago for another project, I think I'll have this in Gryffindor's common room despite being more opulent!

The table that came with the house.....it's a shame I can't use it for its proper purpose, but it matches the cabin and our garden furniture perfectly!
I hope you don’t mind my ramblings and madness! :o))
Michelle xxxx


